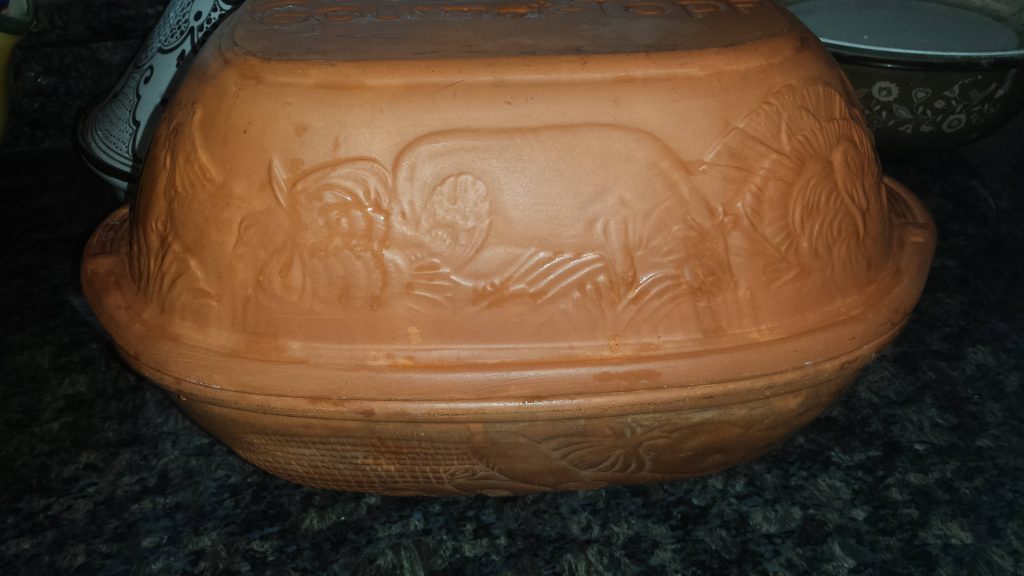
I have only recently branched out from baking all-wheat sourdough breads to adding other grains. It all started with a reconstructed recipe for 2000-year-old Pompeiian bread. For this recipe, I used a variety of grains available to the inhabitants of Pompeii, including rye and spelt as well as whole wheat flour. The bread had a rich flavor and hearty consistency. And I had a pantry full of flours with which to explore new recipes. My very next loaf of bread was a sourdough rye bread recipe I found on Breadtopia. Almost as interesting as the recipe itself were the videos that Eric had prepared to demonstrate the recipe techniques. I was quite taken by the Romertopf clay baker he used to baked the rye bread, and vowed to acquire one for myself before attempting the recipe.
I was in luck – one of the thrift stores nearby actually had a clay baker on the shelves. Though there wasn’t as much luck involved as you would imagine: Romertopf and other clay bakers are perennial favorites at wedding showers and such. Usually, the poor recipient has no idea what to do with it, and it’s put away on an out-of-the-way shelf. Eventually, it may wind up on eBay or in a thrift store. Since buying mine, I’ve seen several for sale in various states from cracked to pristine. The one I bought was nicely seasoned and in perfect condition. If you price them online, you’ll find that new clay bakers run upwards of $60.

If you decide you’d like to try baking bread in a clay baker, you probably won’t have to shell out $60 or more if you have second-hand shopping available. And you’ll give a marvelous piece of cooking equipment a second chance and a new home.
If you do wish to buy a new clay baker, this is what you want – note that the clay is unglazed.

![]() Römertopf® 11905 Universal Casserole Rustico for 4 People
Römertopf® 11905 Universal Casserole Rustico for 4 People![]() (Affiliate Link)
(Affiliate Link)
My goal in this article isn’t to give you a recipe with step by step instructions. The breadtopia recipe already does that, and does it extremely well, thanks to the included videos. My goal is to give you some tips and encouragement to try the breadtopia recipe for yourself. I think most of the tips will help with any artisan sourdough recipe you would like to try baking.
If most of your bread baking experience is with white flour or with bread machines, the dough you mix following this recipe will be considerably wetter than you’ll expect. It’s ok — the dough is supposed to feel quite sticky. Be generous in flouring and re-flouring your work surface as you shape your loaf and you’ll be fine.
I didn’t have the anise seed called for in the recipe on hand, so I substituted extra fennel and caraway seed to make up for it. It’s the combination of the seeds and the orange peel, as much as the rye flour itself, that gives the bread its signature flavor.
A note on the second rise: I have a couple bannetons (wicker baskets to put the shaped loaves into for the second rise), but none of them are the right size and shape for a loaf that will fit into the oblong clay baker. I made do with a glass loaf pan. I’ve tried different liners in the glass pan, including a cotton dish towel, plastic wrap and paper towels. You’ll need to generously flour whatever you use for a liner to keep the dough from sticking. I think the prettiest loaves so far were the ones that have a bumpy surface pattern they pick up from a paper towel liner.
When you preheat the clay baker, you don’t need to soak it in water first. Just be sure to preheat it from room temperature. If you put the baker into a hot oven the sudden temperature difference could cause it to crack. Be careful not to put the baker or lid on a cold surface when you take them out of the oven, too. A kitchen towel on the counter top will be protection enough.
I’ve found that some breads will stick a little (or a lot) to the bottom of the clay baker after they are cooked. You can sprinkle cornmeal into the bottom of the baker, and also on the bottom of the loaf and it helps quite a bit. You can also put a piece of parchment paper in the bottom of the preheated baker just before you tilt the loaf of dough into it. Be very careful to avoid touching the hot surface with bare flesh, though!

Above, the loaf has just come out of the oven.

Let it cool on a wire rack for about an hour before cutting it. This will prevent a soggy center. Note the pebbled look to the crust. This pattern was from the paper towel lining the glass loaf pan.

And a slice! The kitchen is permeated with the aroma of rye, orange zest and fennel.
This bread makes fantastic Smørrebrød, Danish style open-faced sandwiches. It’s also yummy all by itself!

You’re wetting my appetite for sourdough, which I gave up about a year ago. I see it in my dreams and throughout my day. OK, I’m not meaning to overly dramatic, but this really looks delicious, and you do such a wonderful job of inspiring the artisan bread maker in us all. Thanks!
Thank you! This recipe has become a favorite. I follow it more closely than I do many recipes because I’ve been completely pleased with the results from the first effort onward.
I’m baking a whole wheat loaf with raisins, dates and walnuts today. I’m still experimenting with the recipe because although the flavor is excellent, I haven’t been entirely pleased with how it looks!